Saturday, September 30, 2023

Stress-free Card Making Summit

I've watched a few of the crafty sessions shared at the Stress-free Card Making Summit!  My good friend Therese made a pop-up card using my favorite Altenew Poinsettia die - how could I resist making one, too?


Therese shared a simple way to color block a card base... and how to POP-up a
Poinsettia when the card is opened...


and how to use patterned paper to cut the Poinsettia for fun!  
I've done this many many times - today I used all painted woodgrain papers!  


So much fun 'homework' to do - I'd better get it done!
=] Michele

All patterned paper is from Craft Consortium:  Wood Textures, and Grunge - Dark Tones.
Cardstock is from Concord & 9th: Pebble and Lemongrass

Friday, September 29, 2023

Shucks, I missed it!

I got so busy that I missed the deadline over at The Four Seasons Challenge - sorry ladies!  But I still love your inspiration SO much!  Here it is for the rest of you to see where my inspiration comes from...


See the loveliness in the top left corner?  Here is my take on that...


I've used these inks today... with some lovely products from The Greetery, and PTI!
My scored panel represents the cabinets - and a little triangle of embossed white for the 
countertop!


Now back to my studio for more fun!  BUT before I leave you, I must apologize to those of you I follow through FollowIt... I broke my feed somehow and haven't had posts delivered for over a week!  I'm all set now and thank the customer service folks at FollowIt for the quick service!

Have a great weekend!
=] Michele

Thursday, September 28, 2023

Freshly Made Sketches #605

I have had this set from Miss Ink Stamps a few years now and have had such fun with it ... here's another, this time for Freshly Made Sketches and my friend Karren's Sketch #605 ... 


I dry embossed a piece of vellum using my SU Timeworn Type folder
to treat my card base to a little texture... debossed my pink moon!
The tree branch is from Altenew's Orange Blossom die set.
Both the outside [a bit of a snip by me to make it work] and inside sentiments are included in the set!


I've just heard that 'the boss' is taking tomorrow off... yikes!  I better get as much crafty fun done as possible today!  Including getting this one in the FMS Gallery!


Thanks for stopping by!
=] Michele

Miss Ink: Just Be-Caws 

Wednesday, September 27, 2023

Down on the Farm

I have a darling young woman in my life who lost both of her parents within months of each other this year.  Lynn and her husband built their 'forever' home on property they bought from her parents when she realized they would need help - more likely so she would be close for as long as she had them.  

Their darling home overlooks the vast fields of the farm, and I couldn't help but think of Lynn and her parents' farm when Marcia passed this Harvest Home set from The Greetery on to me.  It was high time I used it - thank you Marcia!


I won't sugarcoat it - these tiny little layers [three each for the house and barn] of detail are a test for my strongest readers!  It's a fabulous set - did you spot the rolled bales of hay?  How wonderful that they small enough to build on these wonderful leaves!  I pulled a few stamps from their Destination Summer set: the sun and 'trees.'


I think this favorite debossing plate from Altenew gives the perfect breath of wind to give those leaves movement - of course the deep grey makes me very happy.

Thanksgiving will be very hard for Lynn and her siblings this year as it has always been spent gathered around the farmhouse table... I will be missing her mom, too.  She was a best friend of mine for nearly 50 years.

I'm so blessed to have all of you in my life - thank you for your friendship! 

=] Michele

Tuesday, September 26, 2023

Just us Girls #698 Sport!

Beyond golf, I am the least sport-loving person you might know!  Don't even get me started about watching sports on the television OY!  But you know what I do love?  Completing a sporty card for JUGS#698!  Here's that CAS little figure skater* I mentioned...


A piece of foil paper from Michael's made an icy rink complete with blade marks!

My job here is done - for today! 

=] Michele

*you will find all the details about this set on my last post!

Making a scene!

Hello, my friends!  Glad you stopped in ... I shopped the Flash Sale at WF and a darling little set from Waffle Flower: Winter Fun was delivered - I'm seeing ALL their sets with new eyes and envisioning their darling characters on that Postage Collage die!  

Without further ado... do you want to build a snowman??  Here's how it all starts:


I placed the matting stencil over top of the Collage die cut panel and stamped all these snowmen and trees in Copic friendly CP ink.  Then I did a little bit of background blending using a torn piece of post-it paper and blue ink with a small blending brush.  I wasn't too worried about getting a little ink on the images.  
Ha! that little dude in the lower middle is on his back on the skating pond - 
he shares my skills!

Then I spent a little time adding Copic color to the images...


... adding some details with the postal stamps and coloring stencils.

The JUGS team are asking for a sports theme this week for challenge #698 - I think these darling little figure skaters fit the bill perfectly!  I just have to make another that is a bit more CAS!


I love that Waffle Flower designed a Winter Cityscape cover plate die - here I've used a piece of patterned paper to make up the rink and city skyline in the distance but kept the snow white - except for all the 'dazzle' which I added with a Jelly Roll Stardust sparkle pen.

That's it for me this morning - I'd better get back to that CAS design!
=] Michele

Monday, September 25, 2023

Too soon for Spooky?

It's never too soon for spooky!  I love Halloween!  Know what else I love?  Fabulous friends who send me the most wonderful gifts!  Today, I've put one to use...


Leaf Fragments are from Tim Holtz and Sizzix and I loved the card that came with the gift so very much I recreated it!  I couldn't help myself giving them all the Halloween colors I love and a little bit of glow using Tim's foundry wax!


My cover panel started with a piece of curry paper that was debossed
using my favorite plate from Altenew then lots of distress ink was added - a little random swiping with a mini-Versamark pad was then heat embossed in gold.
This fun sentiment from PTI's Spooky set was just the ticket!
Finally, a smattering of PF gems and my haunting was complete!


But before you think they can only be spooky, check them out in these gorgeous colors...


And lastly - here is the gorgeous card that accompanied the gift... Donna really
brought her leaves to life didn't she?  Love you, my friend!


Okay, playtime's over - off I go ... that laundry doesn't load itself!  Hope you are having a good start to your crafty week!
=] Michele

Saturday, September 23, 2023

I 'swiped' a card!

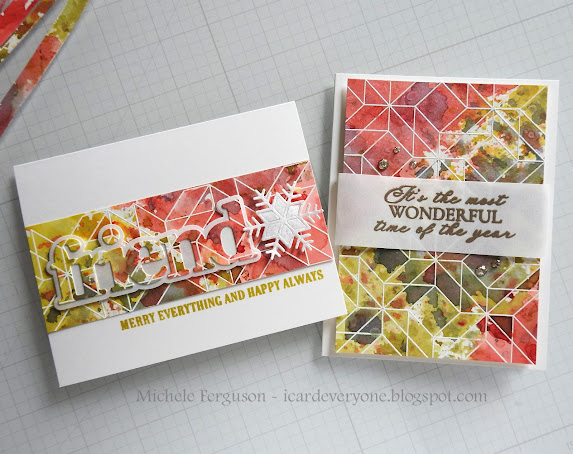
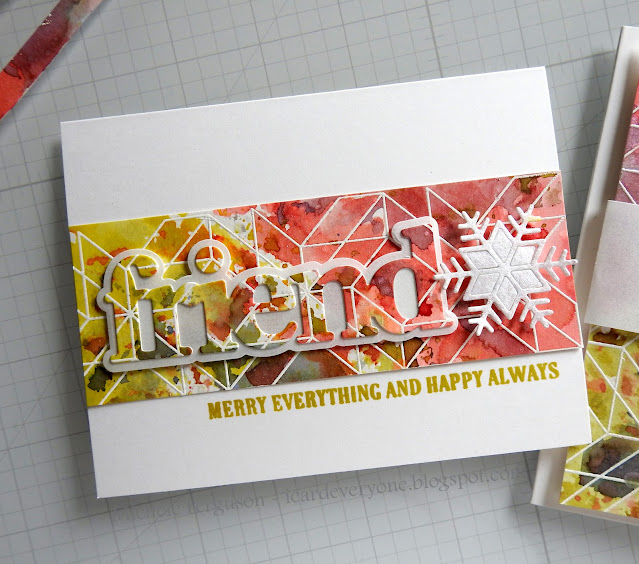
This is me not being able to waste a thing... remember that baby wipe trick I used yesterday?  [One that I'm quite sure I learned from someone else - Loll, maybe?]  Well, you didn't think I'd forget to share that card, did you?  


All that beauty from something we all throw in the trash, a wonderful Christmas sentiment from SSS heat-embossed with sparkle puff embossing powder on a belly-band of vellum, and there you have it!

Enjoy your weekend my friends!
=] Michele

Friday, September 22, 2023

Playing Cards with Friends - September 2023

I'm Playing Cards with my friend Richard Breaks today!!  You may know him as Mr. Cardmaker?  Or @rlbreaks on Instagram.  A card maker by any other name has nothing on this guy - what a fun, and fantastic designer he is!

As thrilled as I am that you are back in The Mitten I DO know how unsettling a long-distance move can be, I'm gonna go easy on you!  Here is our assignment:

Use a background stamp to create a emboss/resist panel then create a card [or two] from it!  EASY PEASY, right?  Too easy?  

Make it a Christmas card! and include a sentiment on vellum!

I recently won a wonderful SSS Quilted background stamp on Instagram from Miriam Prantner - thanks again, Miriam!   I stamped, and white heat embossed the image onto a 6x6" piece of watercolor card stock.  Then went in search of a few inks and found some that would mix into each other with a little drama... I think I found the right ones...


I use a little sheet of acetate to add water-y puddles of ink to my embossed
panel - it makes it easier to put the color where you want it!

From this panel, I was able to get two usable pieces - any time I'm making Christmas cards I find SOME way to make more than one, believe me! 


I gold heat embossed a wonderful sentiment from ASD's Angels' Bells set 
onto a 'cummerbund' of vellum for card #1.  
A sprinkling of PF Champagne Glitter Drops couldn't hurt.  


Waffle Flower Crafts' Oversized Friend Print die made it a breeze to 
include vellum on my sentiment shadow layer.  
An old snowflake die - maybe SSS? - looked pretty good cut from vellum but even better with a stroke of Wink of Stella!


Another sentiment from that ASD set stamped in Pigment Craft Co.'s Turmeric ink and my job here is done!   

wait!  I have a bonus!
I couldn't let all that gorgeous ink go to waste...
I did a little 'mop up' with a baby wipe then tucked it into a pretty Poinsettia embossing folder with a panel of bristol paper!  A card will follow, promise!


Okay, Mister Cardmaker, I'm on my way over to see if you've unpacked all of your crafty goodies, or just enough to play today!  Either way, I just know you'll knock my Christmas stockings off!  Thanks so much for Playing Cards, my friend!

Thanks too to all of YOU for stopping by today!
=] Michele

Thursday, September 21, 2023

No-stamping with Therese!

That title doesn't quite get my point across but, if you watch the replay of Therese Calvird's [Lost in Paper] LIVE crafty session HERE it will become clear to you!

I had such a fun time this morning CASE-ing Therese's card.  Someone told me recently that when CASE-ing a design, at least *THREE things should be adjusted to make the design your own - thanks, Jen. T!

Ready?  It all started with choosing my papers:

*Where Therese used solid paper mixed with plaid paper for her flowers - I went with ALL patterned.  Since this paper from PTI is very thin, I first adhered four of them to a panel using a double-sided adhesive sheet.

*I didn't use any aqua or green - instead using solid pink and orange for the stems, leaves, and ferns!

*Therese did some very subtle stenciling on her base panel - I did too but went with dots instead of stripes!  Orange ink on this bright pink certainly kept it subtle. SO subtle that I feel a closeup is a good place to start...


After fussing with the placement everything was adhered using thin foam squares or glue then popped up on my card base.

  
Therese, I always have so much fun hanging with you and your friends!  Thanks for showing us how to make 'no stamping' card designs POP!  OH, and I found a little *BIRD that perched perfectly on my card!  

=] Michele

Freshly Made Sketches #604

I happen to LOVE every card Cécile Ribon makes - so when I can, I love to create using her sketches at Freshly Made Sketches...


Looks like square cards are the order of the day.  I had a little freebie tucked inside my Waffle Flower package.  Their sweet little stocking came in handy today - so did these colors:


Also playing: a little wood from WF Nested Domes, a star from MFT's Blueprints 18, another of those Pinkfresh Banner Christmas - altered - and a domed panel found in my packaging that just needed a little trim and splatter!
My tiny stockings were cut from Mixed Media paper and ink blended using grey and greens then hung with care using twine and enamel dots!

Hope you have a fun day planned today!  Thanks for spending a bit of it with me!
=] Michele

Wednesday, September 20, 2023

Thank you, Deer!

Hello, my friends - so glad you stopped by today!

I have a few more Waffle Flower Crafts Folk Art Deer to share with you!  There is a 12x12 cardstock storage container where I keep all the Christmas patterned papers I've purchased over the years from this place or that ... it's amazing how far one sheet of paper can go!

Take this one from October Afternoon for example ... it was a done deal when I found it years ago - loved BOTH sides of it... and bonus - it has a lovely Nordic feel to it that goes with that deer so well!


A few dies were used in the making: 
Altenew's Ornate Nesting Dies,
an oldie from Winnie & Walter,
and Pinkfresh Studio's Fancy Circles and Lacey Edgers


I spent an hour of my time to stamp, emboss and die cut the 
Pinkfresh Studio: Basic Banners Christmas sentiments.  
Time spent now, for time saved later!

Isn't my Folk Art Deer looking right at home?  I sure wish I could get my hands on more of this Let it Snow design!  I love this last one - especially with those stripe-y pjs I dressed my deer in! 

Now, before I head back to my studio - I have ONE more WF Postage Collage card to share - then I'll stop!  Since I've used all the colors of FALL for my Christmas card, I'm sending it over to D&D at their September Stencil Fun Challenge!


Thanks, my friends, for supporting my enthusiasm over these products!
=] Michele 

Monday, September 18, 2023

Waffle Flower Christmas Postage Collage!

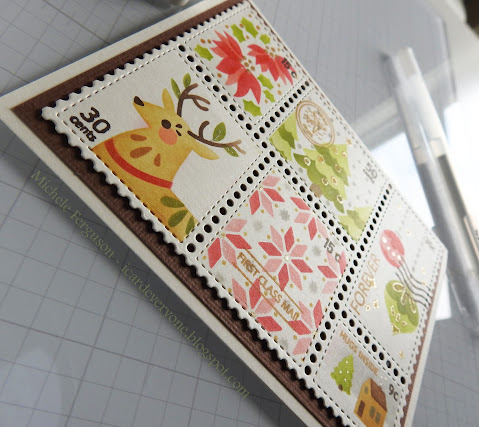
I have about 10 minutes before my dryer starts buzzing - I warned promised to share the next batch of Postage Collage cards with you!  This Christmas Postage Collage stencil set arrived on Saturday - I got to play a little bit yesterday, and once this morning!

Ready. set. here you go...


First in shades of minty green and pinks...


I stamped the details in silver ink - but won't try that again until I get a new ink pad.  After everything was mounted, I went back in with a sparkly Gelli Roll pen... 
there is no easy way to show that sparkle...


Then I went for stenciling on cream card stock - could be my favorite today...


It also has a bit of sparkle...


and warmer ink tones...


Hope you're having a great start to your week - thanks for stopping by!
=]  Michele