Hello, my friends! I'm hoping my experience with my new Altenew StampWheel will inspire others who have added it to their own cache of crafty tools. When I decided to purchase one, I was apprehensive - stamping platforms are not inexpensive! I had a specific task in mind: how can I use it to stamp multiple COMPLETE florals using the many MANY layering stamps I have in my arsenal!
Are you curious? I hope to show you as simply as possible with my photo tutorial. If you have any questions - you can leave them in the comments, WITH your email address and I'm happy to help!
Let's get started:
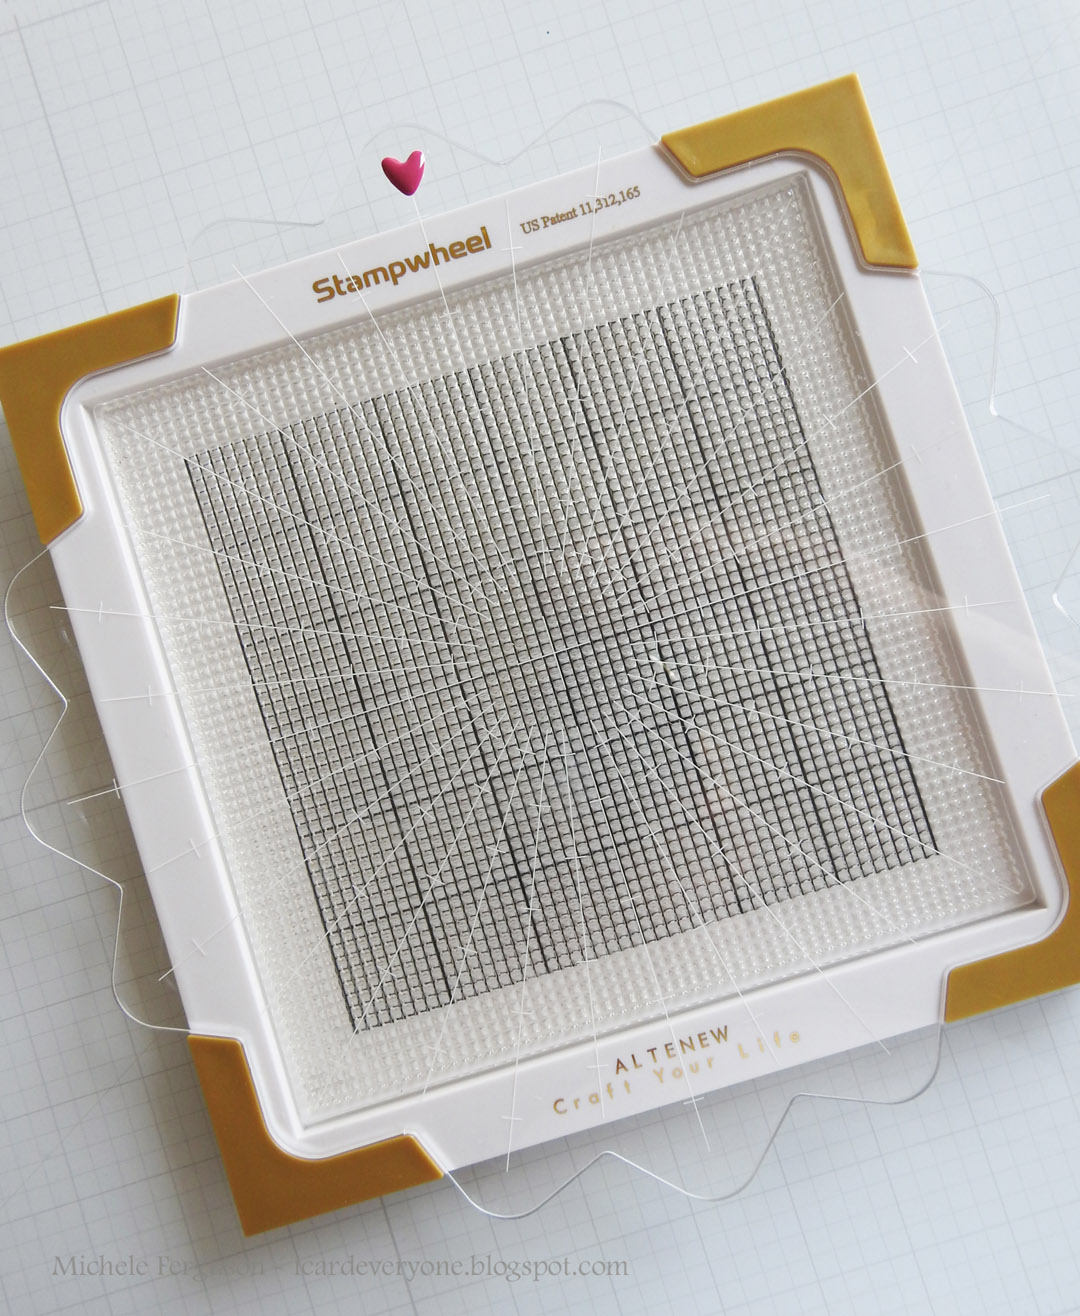
1. Right out of the box, I knew I wanted grid lines. Altenew packed the 'sticky stamp mat' that fits into the platform with protective film - one had just the grid lines I was looking for - just a little trimming around the edges allowed me to find the center of the platform before adding the sticky mat over top.
I measured and fiddled with it until the grid, the sticky mat, and center point of the Wheel all aligned.
Next, I added one of Altenew's darling enamel hearts to indicate the top center position of the Wheel - that does come in handy, and I'll point out why very soon.
2. Choose a layering stamp set from your stash - oh, I know you all have at least one! Today, I'll play with their Build-a-Flower: Anemone. You'll see there are 5 layers that 'color' the bloom, and an outline if you choose to use it. I won't show the leaves for my first set of blooms.
3. I will start my stamping journey by 'sticking' a 6x6 inch piece of 80# Neenah card onto the mat - I use the grid, but I also have a homemade guide [thank you Tom] to make sure that it is indeed centered. [Altenew knew this would be handy and I have their set coming soon!]
Then I position the first layering stamp of my Anemone - the most solid of all - and choose some pretty inks to work with that have different shades of the same color.
It's also important to note that there must be room on the square for that first layer to be stamped four times. I made sure of it and found a six-inch square works for most of the layering sets I have.
4. Pick up the stamp with the Wheel with that marker at top center position, and remove the centering guide.
Flip the Wheel over, ink the stamp, and flip again to stamp in the 1st position then repeat this process moving that enamel heart to the right center, bottom center, and left center - inking and stamping as you go ...
until you achieve four perfectly stamped Anemones...
I mark this first layer stamp as '1' using a scrap of post-it tape.
5. Now, align the second layer stamp right over the first one stamped - just like you normally would by using the handy guidelines included in the instructions for the stamp set.
BUT this time you are keeping the first stamp ON the Wheel - just pick up stamp layer 2 with the enamel heart in the right center position! Label as layer 2 with another post-it.
Stamp with the next darker ink and repeat until you've stamped layer 2 on each of the four Anemones! Here's how that looks:
6. The third layering stamp is lined up over one Anemone and stamped with the darkest of the purple inks... but here's the beauty of this flip Wheel: I can use BOTH SIDES OF IT! So I choose to pick up layer 3, 4, and 5 on the reverse side of the Wheel to make inking a little easier! Just pay attention to where that little pink heart is, and you'll always know which is the front and back side of the Wheel you're on.
It's KEY to label the stamps as you go...
Just in case you want to add a little shadow layer as I have done - SO easy to do
because you know it will always be aligned perfectly!
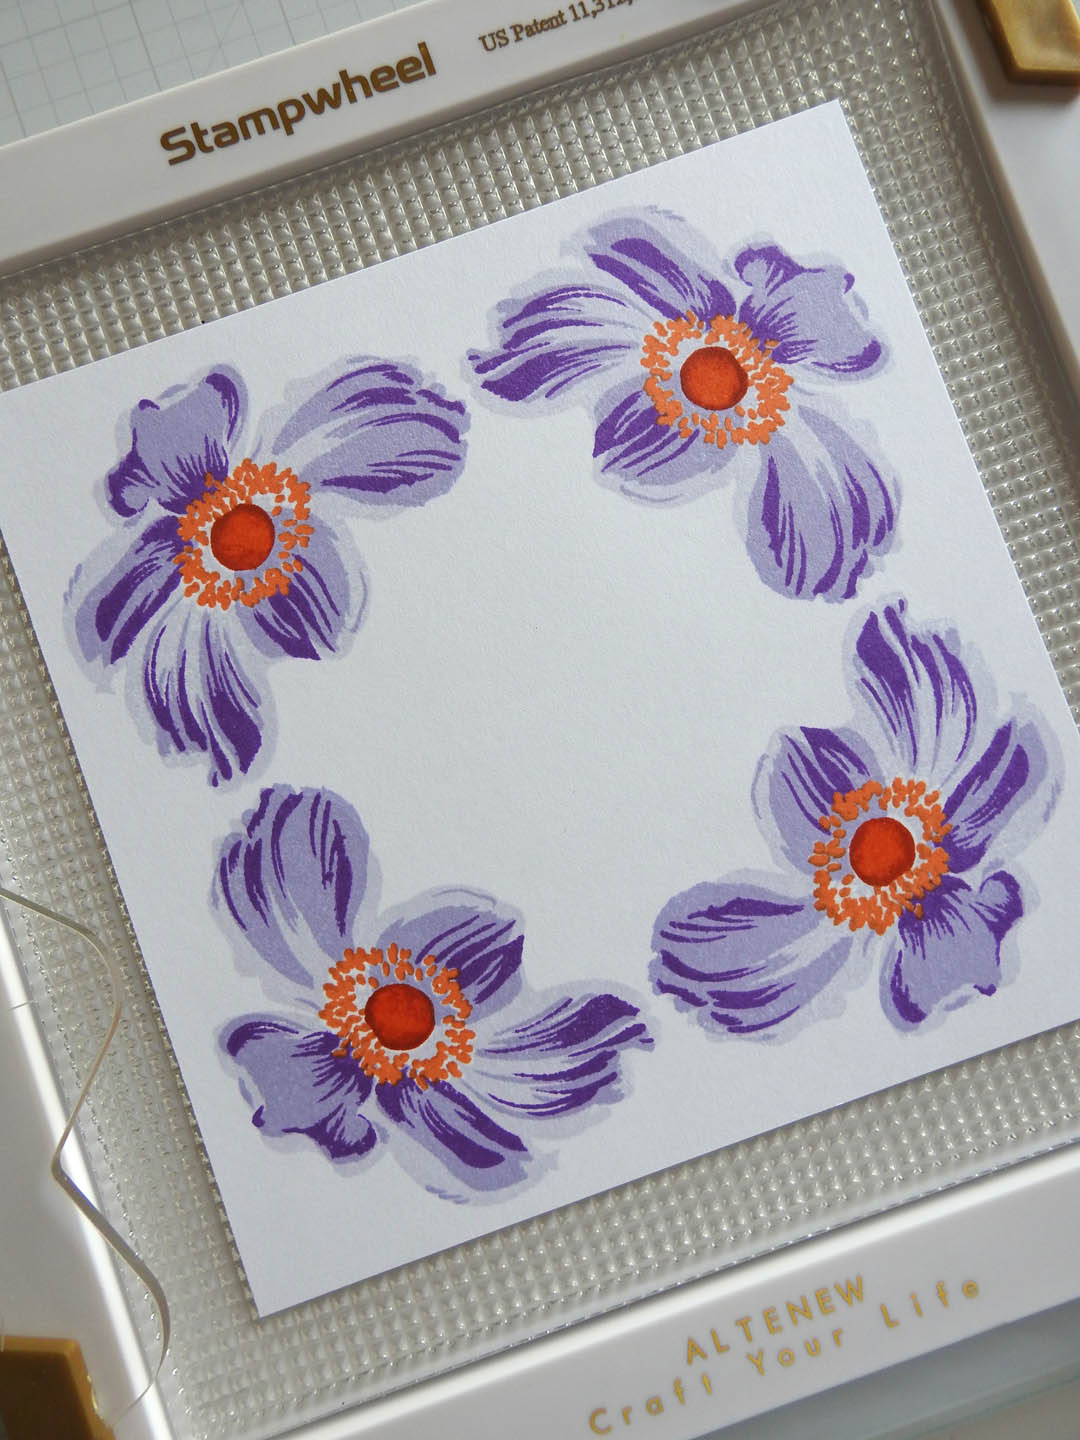
Ready for the reveal?? FOUR completed blooms...
BONUS: I am now set up for stamping four more using the numbered post-it labels as my guide:
Side A
Side B - layers 6 and 7 are the leaves - which you'll see in the following...
It works SO well I decided to time myself for my second batch of flowers:
Less than 12 minutes and that includes two leaves, AND the outline!
SO quick and simple! Goodness - it took me the rest of the afternoon to design three cards!
Have your eyes glazed over?? I wouldn't blame you! I'm so sorry that I don't have the equipment, or confidence to make a video for you, but hope that I've explained my process well enough that you can try it with YOUR own StampWheel!
Thanks for your time today - now I guess I'd better get that laundry started!
=] Michele
I have to thank my wonderful friend Therese of Lost in Paper- she sent me a very generous gift card for helping out with her LIVES on YouTube - because of that, and a little extra out of pocket I was able to spoil myself with this fabulous tool! Thanks, Therese! HERE is her affiliate link to YOUR next fabulous tool! Thanks so very much, Therese!


20 comments:
Your directions were very clear. I've avoided layering stamps for years since I could never get them to line up properly. This tool gives me pause because I think it COULD work, but I'm not sure I'd use it enough to warrant the expense. BUT I am keeping it in mind. Thanks so much; this really explained it as well (if not better) than the videos I've watched.
Michele, what a great tutorial you gave and the ideas of how versatile the wheel can be. I would think the tool is perfect for those who do many 2+step stamping projects. Love the cards too.
Michele, you are just too smart! I love how you got these blooms stamped so fast! They are gorgeous as are the cards. Very good tutorial as well, now I'm drooling even more for the Altenew Stamp Wheel! One day, one day.....Hugs, Brenda
Thanks for the show and tell, Michele! I wondered what this was all about. What a great resource this is!
Oh, thanks ever so much for the tips and tricks tutorial! Very clear and very helpful! Pretty cards too ;)
Thanks for sharing your new tool and the tutorial of it. End result was absolutely fabulous. Well done girlfriend.
Thanks for sharing, Michele. I had heard of the tool, but have never actually seen it. I followed along well until you said you could add stamps to the other side. Then I was confused(not your fault, I have spatial reasoning issues in my brain). I'm not sure how you stamp with images on both sides. BUT, I think it's a great tool if you figured it out and it helps you make multiple beauties! And these are indeed beauties. :)
This is a fantastic post Michele! Your directions for very clear. This tool could take stamping to a whole new level. What a great tool to have when you're feeling uninspired, you could just stamp tons of images to have on hand when you are feeling creative. Thanks for the inspiration!!
Michele... great post, I get it! So couple questions. 1) should we wait until Altenew makes the DH "Tom" rulers? 2) have you considered the other options? Right now I am using multiple sticky mats to do precision multiples. Do you feel this is really worth the investment? Remember I am the girl that is still resisting all the foiling apparatus. Thx.
Michele... just clicked through to Therese's site. It is a bit steep in $ but I do see multiple uses for it. AND... I see they took DH's idea and created rulers. Thanks for taking the time to do this tutorial... I am sold. Sorry I can't share the compensation but I will go through Therese. Again thanks so much!
Fantastic tutorial! I have already broken mine in with lots of stains (don't use alcohol markers on the BTW) and lots of projects. I love it! I like the stamps on both sides trick too. Love it more than my Misti!
Thank you for sharing this with us. I had already decided that it was going to go on my Christmas list (too late for birthday) and now you have confirmed it. I am hoping it will be just as good with turnabout stamps. Love your finished cards xx
Whew you are a genius to figure all that out! The results are beautiful! I’m just happy if I get stencils to line up…..don’t think I am ready for this yet…..😄
Beautiful flowers and cards, Michele! Love that you figured this all out for everyone else that purchase one. Turquoise -- my favorite ones...
Look at you go GF! What a fantastic tutorial, love the idea of 'numbering' the stamps! And all in under 12 minutes too. Thank for the ongoing inspiration x
Great job, Professor! My Cone Flowers are perfectly gorgeous!!!!
I really prefer a picture tutorial than a video one, Michele, and yours is great. I won't be getting one since I recently bought a new MISTI but I did learn this trick some time ago from Dawn Woleslagle using the MISTI and use it often.
I can sure see what a handy tool this is, especially when you know how to use it. I've always liked picture tutorials more than videos. Beautiful cards from your afternoon of putting them together! Thanks, Michele!
Not sure how I missed this post, but I love it!! Like most of the comments here, I like picture tutorials better too! Videos go too fast and I like to be able to take time to study each step till it makes sense in my head (if that makes sense??). Love how you turned all your flowers into 3 BEAUTIFUL cards too for this post...what a labor of love! AWESOME post my friend!! Hugs. :0)
Thanks for the great tutorial with lots of pictures, Michele! Your instruction is very clear. Putting the red enamel heart to the top center is a great idea! Your Anemone cards are fantastic with a different layout for each. I can see the StampWheel will be your good friend. ;-)
Hideko xx
Post a Comment